Learn To Draw Black and White Butterfly
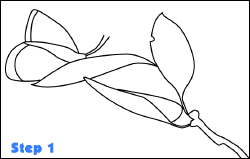
Step 1 - Basic Contour Lines
 To start - get yourself a photograph to draw from. If you squint while looking at the picture some of the basic shapes should start to emerge. With the picture I used, I was able to see the following shapes of the butterfly, a branch and 3 separate leaves coming off of the branch.
 To start - get yourself a photograph to draw from. If you squint while looking at the picture some of the basic shapes should start to emerge. With the picture I used, I was able to see the following shapes of the butterfly, a branch and 3 separate leaves coming off of the branch.
Find the simple shapes in your photo and draw them lightly on the page. At this stage we are not going for perfection at all. You should only be concerned with quickly getting the drawing started. These contour lines shouldn't take you much more than a minute or two to draw. If you're taking longer than that, you're probably trying to make things overly complex.
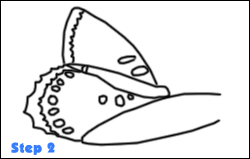
 Step 2 - Adding in more details The way that I approach this butterfly drawing is no different than how I approach most of my art. I try and work from general details to specific details.
What is a general detail? That's what we created in step one. Specific details are smaller details like the ones that you can see in the step two image.
What I'm doing in this step is creating a 'blue-print' that I will later use when I am shading in the black and white drawing of a butterfly. Continue to add details to the other objects in your picture as you see fit. These aren't the only details that I will add in as you will see when you watch the drawing video. The main idea to take away from step two is working from general to specific to even more specific.
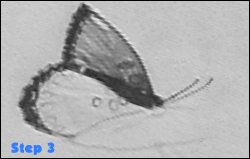
 Step 3 - Shading The step three image is from the video and shows the contrast between a shaded butterfly wing, and one that only has detail lines added into it. I would suggest leaving the shading as your final step after you have added in your details.
Try working in layers when you are shading. Start with a light layer by pressing very lightly on the page. Gradually increase the pressure of your pencil as you add more and more layers of shading. The harder you press, the darker the shading.
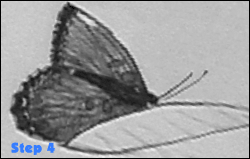
 Step 4 - More Shading & Clean-upIn step four you can see the finished butterfly and an unfinished leaf. Keep going with the shading just as you were doing in step three.
1 التعليقات:
If you've been wanting to learn How To Draw, this is a great book for getting started. Simply follow the instructions and you'll start to get a feel for what to do. The more you draw, the more you see what works for you and your style.
Post a Comment